Custom Profile
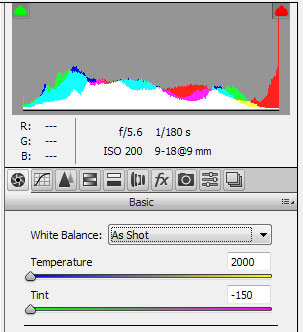
For Raw infrared images the Temperature and Tint sliders are way to the left. Adjustments, under these circumstances, are difficult. To get around this problem a custom profile is used to offset the temperature to a more reasonable value. To create a profile use the Adobe DNG Profile Editor available for the Mac or the PC along with this user manual. This section will cover the basics for correcting infrared images.
The following illustrates the temperature/tint sliders before and after using the custom profile.
The profile will be based on a Raw image, taken with your camera, in the DNG format. To create a DNG image open a Raw image in ACR and choose Save Image (button in the lower left corner of the dialog) and under Format choose Digital Negative. In LR choose Export and select DNG for Image Format.
Open the DNG Profile Editor, choose File > Open DNG Image, and open the DNG file. Set the Base Profile to Adobe Standard and under Color Matrices set Temperature to −75. Choice of temperature is not critical as the goal is simply to relocate the temperature/tint sliders to facilitate further adjustments. For filters with a low wavelength, around 650nm, also set Tint to -100. Under Options specify Profile Name "Infrared" and Export the profile. The custom profile will now be available in both ACR and LR.

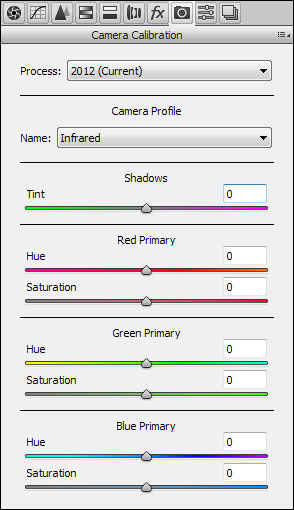
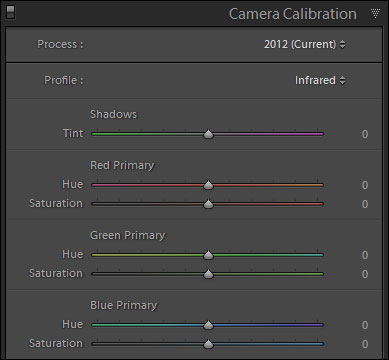
Load an infrared image into ACR or LR, click on the Camera Calibration tab, and specify the Infrared profile. If it doesn't appear, exit ACR/LR and start it up again. Profiles are detected when the application begins execution.
Adobe Camera Raw Lightroom