ACR/LR
When you first load a Raw image into ACR/LR things will look a bit whacko. Colors will improve later when the image is exported to Photoshop and the red/blue channels are swapped. But while working with sensor data in a 12 bit-depth environment let's do the best we can. We'll start by determining a calibrated value for white balance that can be used on all your images. It will change slightly from image to image but at least you'll be in the ball park.
Calibrated Value for White Balance
Under bright sun take a picture of green grass. Fill the frame with the grass and change the focus to blur the image so the the color of the grass diffuses throughout the frame. Then calibrate the camera's white balance to this scene. The grass should now be shades of gray in the viewfinder. Take another picture with this new white balance setting.
- The first image was taken with Auto white balance. It is very red in color and this is to be expected as infrared light goes beyond the red end of the visible spectrum.
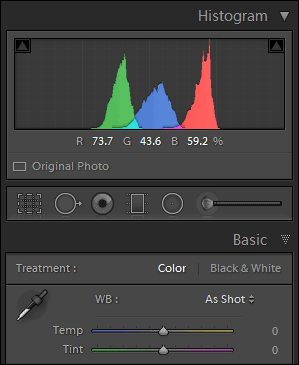
- Photographing the grass with the new white balance results in JPEG files with shades of gray just as it originally did in the viewfinder. In the histogram, below, the three primary colors, red, green, and blue, all overlap and peak at the same point.
- This Raw image was taken while the camera was set to the new white balance setting. Since we are using As Shot as the camera white balance, the results should be shades of gray. However this is not the case. Note that the Temperature/Tint sliders are pegged to the left. They need to move further but are unable to do so.
- A custom profile is applied to automatically reposition the Temperature/Tint sliders. Now the image is properly white balanced and the three primary colors peak at the same point.
From image #4 the calibrated values for Temperature/Tint are 9400/-94. This works for my camera and my grass. For your camera and your grass you'll need to experiment.
White Balance
Although the calibrated value for white balance can be part of a preset, adjustments to this value are often appropriate. The easiest way to adjust white balance is to choose the White Balance dropper and click on green grass.
It's best to sample a large area with the White Balance dropper so you get an average of values. In ACR drag the dropper to create a rectangle that defines the sample size. In LR the area sampled depends on the zoom level so zoom all the way out (Fit), enable Show Loop (under the image), and move the Scale slider all the way to the right.
If you find tree leaves or other small features that you want to modify, fine-tune the white balance by making the selected area smaller. Remember, you are working in an environment where red will turn into blue, and blue will turn in to red. And when you white-balance a feature its color turns to a shade of gray. For example, if you see brown or yellow leaf, click on the leaf and it will turn from blue to gray in the final image.
Presets
Presets, that can be made in ACR/LR, will simplify processing. These are my personal settings. You'll have to experiment to find out what works for you.
Color Adjustments
These settings sharpen image midtones and yield blue skies:
Clarity: 70
Saturation: 25
HSL Orange Hue: −50
HSL Yellow Hue: −50
HSL Orange Saturation: +50
HSL Yellow Saturation: +50
Calibrated value for White Balance
Black and White Adjustments
These settings sharpen image midtones, yield more detail in green vegetation, and darken skies:
Clarity: 70
Grayscale Mix: Orange: −50
Grayscale Mix: Yellow: −50
Grayscale Mix: Green: −50
Calibrated value for White Balance
Preset Settings
Despite appearances, the same presets are defined in both ACR and LR. There are two presets: one for color and one for black and white images.
Infrared Color Infrared B&W
Adobe Camera Raw White Balance
Clarity
Saturation
HSL Adjustments
Camera Calibration
Process VersionWhite Balance
Clarity
Grayscale Conversion
Split Toning
Camera Calibration
Process VersionLightroom White Balance
Clarity
Treatment (Color)
Saturation
Color Adjustments
Process Version
CalibrationWhite Balance
Clarity
Treatment (Black & White)
Black & White Mix
Split Toning
Process Version
Calibration
After invoking the preset on a new image, fine-tune white balance and visit Basics to adjust Exposure, Contrast, Highlight, Shadow, Black and White points. Also check color settings as needed. The preset is just a starting point.

